Showing posts with label crafts. Show all posts

Tuesday, April 5, 2011

Fun With Amazing Paper Toys and Models

From The Toy Maker
Way back when, we used to have fun exchanging flat travellers (aka flat Stanley)-- check out this old post for details. We used to make our own flatties and even got into paper dolls. One thing led to another and we discovered all kinds of paper doll and paper toy sites! Really, there seems to be an endless supply of free paper dolls... all you have to do is Google "free paper dolls" and you'll be flooded with websites or click over to just the images! From Berenstain Bears to old vintage sets, some cost but many are free.

Well, I'm not going to list all those sites. What I am proposing to share are just a couple I had left over in my bookmarks.

Download a Dragon is a good start for those mythologically oriented. Here you can print out castles, dragons, mermaids, unicorns, and more. The creators of this website also did Download a Dinosaur. The items here vary in quality, but are sure to entertain!
From Paper Toys

And more fun can be found at general paper toy websites (just search "paper toys").

The Toy Maker has some really lovely paper toys to make. They have everything from cards, boxes, baskets, and bags to origami, paper toys, and ephemera. Categories include animal and bug friends, fairies and magic, math and learning toys, toys that move, gifts and boxes, and fun and whimsy! Great for children and adults alike.

And then there is Paper Toys with all kinds of detailed vehicles to make, masks, dinosaurs, houses (Bill Gate's), buildings (Empire State Building/ Shakespear's Globe Theatre), historical places (Mt Rushmore/ Great Wall of China), and way more... well, just follow the link to see the list.

From RavensBlight
Step it up a notch with a more spookier set of very detailed, rich coloured paper toys at RavensBlight Toy Shop. These haunted paper treasures are sure to delight those of us with a different sense of humour ;-) What's there? Coffin gift boxes (awesome for Halloween parties!), cemeteries, haunted houses, all kinds of skeletons and monsters, magic tricks, cards, dice, board games, life sized human skeleton, werewolf mask, colouring pages, a balancing bat, pinhole camera, skull, more masks, helmets, a marionette, and so much more. And several of the haunted houses come with background stories!!! This is a real must check out ;-) Um, can you tell I like Halloween!   

From RavensBlight


__________________________________________________________________________

Monday, December 27, 2010

Idea: Chocolates!

Bulk Chocolate Melts
Any time is perfect for chocolate making, but holiday season is very ideal too: gift making!

I remember making coloured chocolates in Kindergarten, in fact I have a photo of it somewhere. Although I didn't look terribly pleased in the photo, I have fond memories of 'painting' the chocolate molds!

Used a Spoon To Mix the Colour and to Pour
We aren't painting with a brush as that detail is more than my son is interested in. In fact, I think the quicker the better in this case. Um, yeah, it means the chocolates are ready sooner! It's all about the eating :)

I purchased this pretzel chocolate mold from Michaels, but my son is not so keen on the mixing of chocolate and pretzels. Pretzels should be separate, duh  ;-)
The chocolate melts (a white and a dark chocolate) I bought in bulk at the grocery store as Michael's price is ridiculous, but I did buy the candy colouring from that craft store.


Oooey Gooey

And it was so simple...
just melt, in the microwave or double broiler
and pour!
---colour the melted white chocolate before pouring, if you feel like it!
Let them set in the fridge for 5-10 minutes (quicker, but not necessary)
The chocolates fall out of the molds very easily, so it's important not to flip over the mold too high or the chocolates will fall out and shatter... but you can always remelt and pour!


In the Mold

No Pretzles at the Bottom!

No Colours Added

Friday, December 17, 2010

Reuse Craft: Gift Tags and Cards

Tag Template
What to do with all those holiday greeting cards?! Of course, many of us display them during the season and some of us keep them forever, but I think the majority of people trash or recycle them.

Here's an idea:
Collect old cards (keep yours for the next holiday season) and cut them all up!

Lovely Tags By My Son
If there is no writing behind the front picture, you can make gift tags. I made a quick template for my son to use, but he wisely knew better and created his own fantastical tag shapes  :)

If there is writing on the back of the picture, or you prefer cards, cut up the old cards to make new ones. You can buy pre-folded blank cards with envelopes at crafts stores or simply use card stock (like I do) to make the cards and buy note card sized envelopes for them. Rearrange the cut up pieces to make a pleasing card and give it away... after writing something nice in it!


My Son's Notecards

Saturday, December 11, 2010

Idea: Play dough!

This Is a Bunny or the Sears Tower
I have this fun recipe of Kool-aid play dough. It smells awesome, so good, but it's not edible. Well, it isn't toxic, but it won't taste good! It keeps for months in an air tight container and is fun to play with. I'll include the recipe, but feel free to google play dough recipes! There are so many all differing in colour, texture, and consistency. And some are even edible!

I tried this recipe with a non-white flour because I was out. And I must say it is best to stick with the white flour! It smelled funny and required adjustment in the amount of flour added. Still, in the end, it was play dough and fun!

My son began with the typical boy themes: airplane, dump truck, and a dead louse. When I took another peak at his creations a new turn of events: Fallingwater, Empire States building, Sears Tower, and the Guggenheim! Ah, he is his father's son... my son, the son of an architect! Go figure!

And now, for the recipe...

I Believe this is Fallingwater

Kool-Aid Play Dough

2 1/2 cups flour
1/2 cup salt
2 packages of unsweetened Kool-aid (best to be the same flavour for best scent and colouration)
3 tablespoons of oil
2 cups of boiling water

We Can't Remember What This One Is?
Mix all the ingredients together and knead into a ball. Store in an air tight container.
If it gets a bit dry, add a little bit of cold water and knead it into the dough. Should last three months!


Have fun being creative!

Friday, December 10, 2010

Mixology: Bath Salts

Who doesn't love bath salts? Oddly enough my son will often choose bath salts over bubble bath. Furthermore, he just loves mixing up his own bath salts. Is it the colour mixing he loves? I'm not sure because he also really enjoyed bagging up his multi-coloured creations for a bake and craft sale he participated in (which is today). In each bag, he layered the different colours of bath salts and topped it with a sea shell.

There's not much to this idea! It's just too simple.

*Buy Epsom salts and food colouring.
*Poor salts into a bowl and add drops of colour.
*Blend with a spoon (we found a bit of grinding action with the back of the spoon very helpful).
*Put the coloured salts into an air tight container.
*Use on yourself or give as a gift.

That said, other things can round out and make for even better bath salts.

Consider adding sea salt, baking soda (softens the skin), or other salts. Kick it up a notch with powdered citric acid! Citric acid, which I found out the hard way has a shelf life, gives the salts a bubbling fizz and is the key ingredient in bath bombs.

Don't want to use food colouring? Try a liquid soap colouring, micas, or test out natural alternatives. Just keep in mind that the adding of liquids to baths salts needs to be kept to a minimum, lol. Well, at least until it hits the bath water!

Ready For Market!
Ah, and then there is the wonderful world of scents. You can purchase fragrance oils or essential oils to create an aromatic bath salt. Not all of the available scents are good for skin contact, so be mindful when choosing. Oh, and it is advisable to mix such oils with the salts in a glass or metal bowl as plastics will absorb the scent too readily. You can use a plastic bowl, but it will no longer be food safe. Lol, but if you don't believe plastics are food safe anyways.... the point it moot ;-)


That reminds me, I *do* have a Dutch Chocolate fragrance oil that my son would probably flip over. I'll pull it out for the next round of mixology!

Tuesday, December 7, 2010

Art Shows

Maps
I love art shows and gallery openings. My son? Well, he often gets bored if the food isn't good enough!

An art opening isn't everyone's cup of tea, but what about an informal private family art show?

This is exactly what my friend did and it was a great idea that turned out awesome. Once the idea was conceived, she sent out invitations to two other families (yes, we were one of them, lol) requesting their attendance for an afternoon of art and fun (read... play time). Actually, I think the idea and dates were bounced around for a while before the formal invites went out, so we all had lots of time to create. Adults and children alike were encouraged to provide art pieces for the occasion in whatever form inspired them. No pressure. No rigid rules. Anything was possible, even not contributing!

Since this was on a weekend day, it was a  whole family participation event and almost everyone was able to make it. It was a typical cheese and cracker event complete with beverages and ?candy?! Ok, not quite sure who's idea that was....   :P
Origami

With little plates in hand (or drink) we toured around the house taking in all the creative pieces displayed. The artists all had a chance to talk about their work and answer questions. Taking cues from the younger artists, we didn't over linger but kept the momentum going. Once all displays were enjoyed, play time erupted and the ensuing chaos was dismissed to the upper or lower floors of the domain  ;-)

I'll share some of the art that was conjured up for this day! There were two video installations (one Lego, one Pokemon), four sketch books, origami, snowflakes, kirigami, drawings, paintings, play dough model of Falling Water, two house models, maps, a display about the zodiac, and ice candles!

It was a great time!

The initial idea was that we'd drop off the art (and bios) before hand for our hosts to put up and display. Like I said, this was a wonderfully informal event and that little bit did not come to pass. We arrived with our treasures and chose rooms or wall spaces in which to set up. It worked out great. 


Saturday, November 6, 2010

Idea: Gratitude

One Clear Coat and Ready to Be Painted!
Gratitude Rocks! So why not grab a nice sized rock, wash it up, paint it if you feel like it, and carry it around with you in your pocket as a physical reminder to feel gratitude, to find gratitude from every situation, and to express gratitude. In fact, why not paint some extra for family and friends! Give the gift of gratitude.


Many Coloured Pages
Family Gratitude Binder. It really doesn't get any easier than this. A simple three ringed binder and several blank pages within. We chose unlined pages of various colours for fun, to mix things up a bit. My son had lots of fun stamping and colouring a title page. His title: The Big Book of Things We Love and Are Grateful For! And any time we feel like adding to it, we write down the date and then what we are grateful for. I like to start each piece of gratitude with the words "I am grateful for..." I like the rhythm; I like the emphasis of the repetition. Often someone doodles or draws an illustration, but it's all informal and reflects our current moods of creativity.


Family Gratitude Binder
The Gratitude Journal. Articulating gratitude in a journal format is similar to that of the Family Gratitude Binder, but can be more formal and certainly more private and personal. I've heard it recommended to jot down at least three things you are grateful for each day. I challenge you to write up a whole list, a whole page, of gratitude. This is a great way to find the extra little things you are grateful for, not just those big ones. Of course, it all depends on what size your journal is as to how much of a challenge this truly is ;-)

Prayer/ Meditation/ Mantras. An expression of gratitude before a meal or before bedtime or upon waking are all common and wonderful times to verbalise gratitude. Why not meditate on gratitude too?! Meditating on the word 'gratitude' would be one suggestion. Meditating on the concept of gratitude would be another. Or simply meditate on all the things you are grateful for. Try googling "guided gratitude meditation." I don't have any to recommend as I have not done this, but guided meditations can be great-- hopefully there is a good one on gratitude. Let me know if you find one!

Gratitude Peace Beads
Gratitude Beads. Similar to prayer beads, gratitude beads can be a wonderful reminder and tool for gratitude. Like the gratitude rocks, you can carry these with you where ever you go and use them for comfort when you're stressed or to count off all the things that fill you with gratitude. They can be used any way you wish, but one idea is to say one thing you are grateful for per bead. You can use any string of beads or, better yet, make your own. This is an excellent craft for the young and young at heart ;-) My son enjoyed making his "peace" beads so much he made a set for me. He wanted peace beads to help him remain calm and peaceful, but he also used them as gratitude prayer beads.

Gratitude Poster. As a family, a group, or individually, make a gratitude poster. This is a fantastic idea for a special occasion: Thanksgiving, New Year's Eve, someone's birthday, or some other milestone. Depending on personal preference, the poster can be drawn, painted, collaged from magazines, etc. The theme/occasion will inspire the direction of the poster. For example, if it is for someone's birthday, it would make sense to express all the things the guests are grateful about that person. If it is New Year's Eve, perhaps a poster of all the things you are grateful for from the past year.

Garland of Gratitude. Use string, yarn, ribbon, or streamers and tape/glue written gratitudes onto it. Write the gratitudes out on paper leaves, flowers, or a shape of your choice. This would be a fun party or dinner activity whereby the guests help decorate!

More ideas?

Sing a song of gratitude.
Dance a dance of gratitude.
Write a poem of gratitude.
Start a gratitude blog... a 365 day challenge!
Collect quotes on gratitude, create a booklet... give it as a gift.
Create gratitude cards... with quotes, or your own expressions, or as thank you cards.
Tell someone why you are grateful they are in your life.
Give a gift just because, in the name of gratitude.

I found this lovely idea on "Show Me Crafts" blog: Gratitude Tree

How do you like to express your gratitude?

Tuesday, October 26, 2010

Crayon Molds!

I just had to make an additional post on all our melted crayon fun and a plug for reusing items!

I love reuse stores!
Goodwill, Value Village, the Bissell Centre, the Edmonton Reuse Centre, and the new Free Store are a few of the ones available to us in Edmonton! And then there are all the consignment stores too.

I highly recommend second hand stores period, but they are absolutely fantastic for crafts. Don't have a pot to waste or risk? Go to a second hand store! Need some molds? Go and find some from a reuse store, you just never know what you may find!

Arrow crayons
I went to Goodwill and found all kinds of treasures. Of course there were old muffin tins of various sizes, but there were also all kinds of novelty ice cube trays and silicon molds too! And these molds were only $0.49 each, what a deal! I didn't buy everything I saw, lol. However, I did come home with three new rubber ice cube molds originally from IKEA.

Long Crayons
Now, I must admit, the rubber molds were not the easiest to use for this particular craft. I had placed them in the freezer to cool off quicker and found the new crayons difficult to remove. But! Once I let the molds warm back up to room temperature, the new crayons were a *bit* easier to remove and I didn't break any--- but they certainly did not slip easily out like the previous shell and pyramid molds I used. Oh, and the crayons stained the rubber IKEA molds. C'est la vie!

Ikea rubber molds
Another note to add:
The shell crayons were a huge loot bag hit. The kids loved them. And no one ate them... since inquiring minds wanted to know ;-)

Monday, October 18, 2010

Idea: Melt Those Old Crayons Down!

Make Old Crayons, New!
If you have ancient crayons lamenting in a drawer or minute stubby crayon ends, STOP, don't throw them out! Here's a wonderful craft to recycle those unloved, unused, but perfectly good crayons. It's very easy and can be very inexpensive... or more expensive depending on your choices.

 The idea is to melt the old crayons and create new ones in fantastic and inspiring shapes using molds. However, you can also use old muffin tins, ice cube trays, inexpensive silicon molds, small tomato paste cans... or whatever your imagination can conjure up.

I used an old ice cube tray with pyramid shapes. Plus I bought a sea shell mold. I specifically bought the sea shell mold to create crayons for birthday loot bags! Since I didn't think the plastic mold would work with the oven method, I chose to melt the crayons, double broiler style, on the stove.

[Note, this is not the most kid friendly method, but does result in very kid friendly crayons! Adult supervision is recommended. Melting crayons in the oven with oven-safe molds would be more hands on fun for children as they can make their own colour creations, see the craft link near the bottom of this post]

Materials
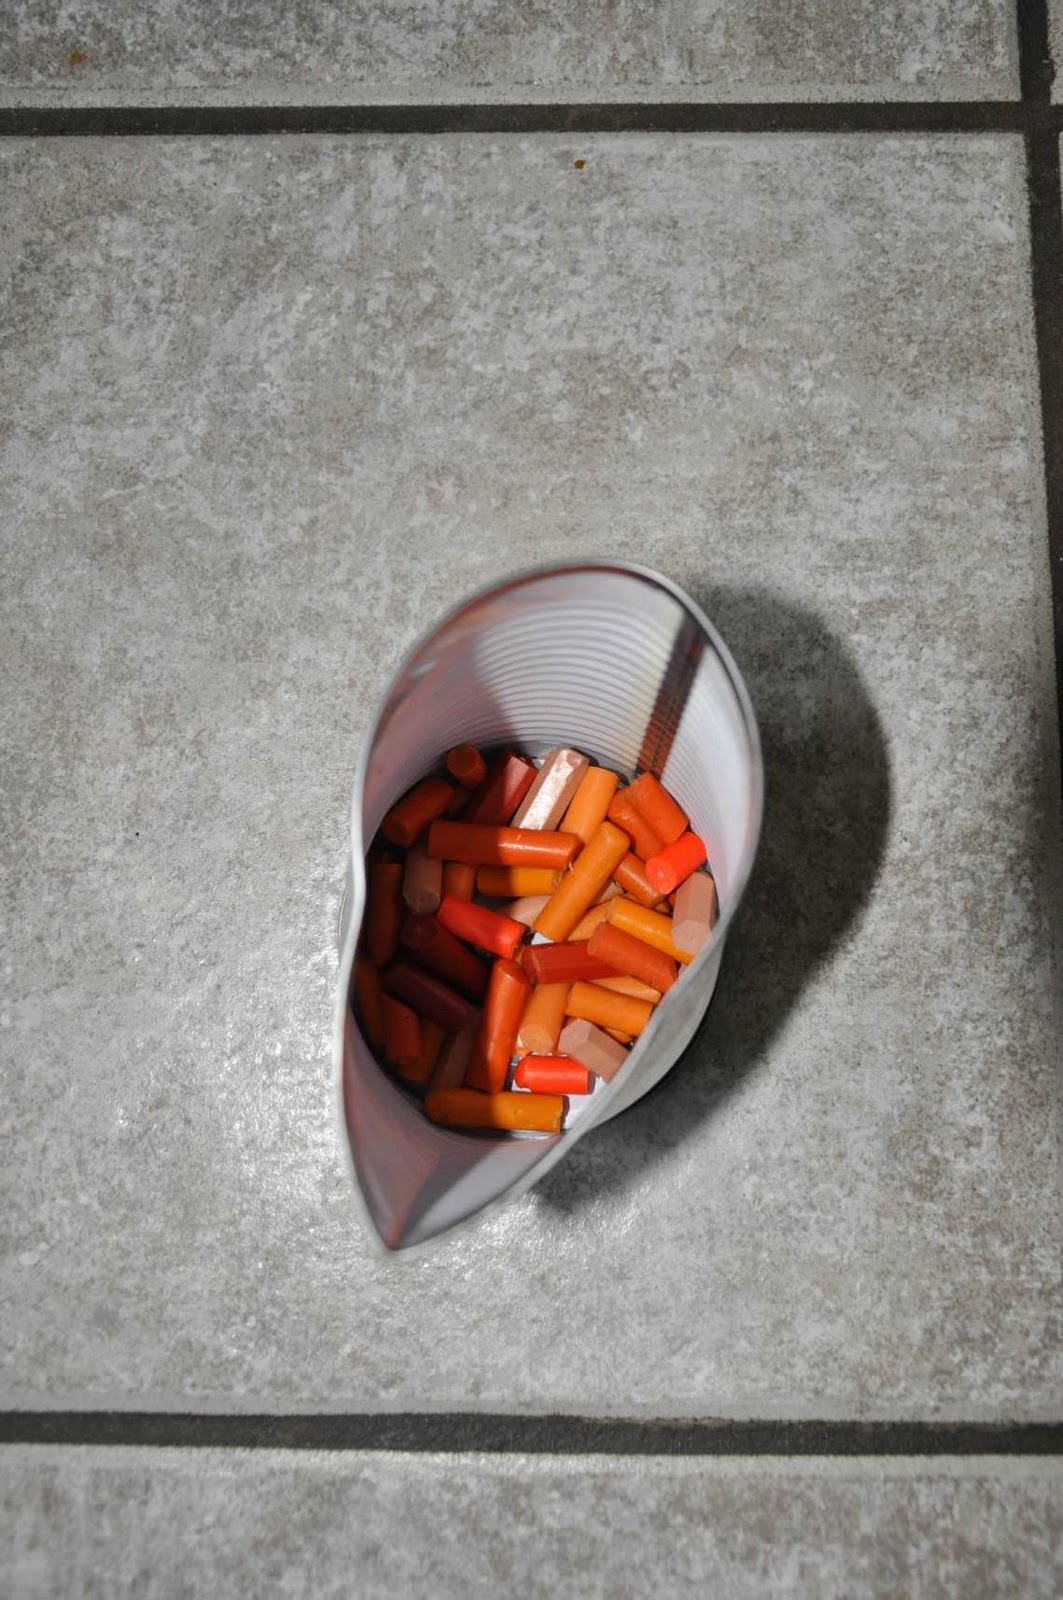
old crayons, papers removed
melting container (I used tin cans)
pot for the boiling water
molds 

Instructions

1)  Prepare the crayons.


          Start by removing all traces of paper from the crayons. And it helps if you sort the colours. Some people say it's important to sort by crayon brand too as not all crayons melt at the same time. However, I did not bother to do this. It is true that they did melt at different times, but this stove method allows for such a variance, just keep heating and swirling till all of it is melted!

2)  Melting.

          Bring some water in a pot to a boil, then lower to a simmer. Don't use too much water or the cans will not be heavy enough to stand up in the pot and will bob around. It is also advisable to use an old pot that you are not worried about ruining because crayon wax can get into the pot and make a mess. Make sure your tin cans are clean and dry (water and wax don't mix). I bent the tops of the cans to make a very useful pouring spout.
           Break the crayons up and put them into a can. If you start with the lighter colours, you can use the same can with a darker colour after.
          Put the can(s) into the pot of water and gently swirl the contents as they melt or stir with a wooden skewer/ plastic spoon. Careful of the steam! Using oven mitts is also helpful.

3) Pour.

         Once the crayons are completely melted, remove the can(s) from the water. Dry the outside of the tin with a cloth to prevent water dripping into your mold with the wax. The, start pouring in to your mold!
         You can do solid colours, layers of colours, or mix two colours and swirl with a toothpick (just a little bit). If you are melting in two separate cans at once, you can pour one after the other and the colours will meld and swirl together for a different effect.

4) Let Set.

          The molds are filled, now let them cool. Putting them in the freezer for 15-20 minutes will speed up the process; however, you may wish to let them set just enough that movement will not risk spillage. 

          Once they have set, remove them by turning the mold upside down. Usually they will slip out easily and quickly because they contract as they set, so make sure you are doing this close to the counter or table. Otherwise, they make break (but you can always re-melt them).

5) Go Colour!

        Ah, you can figure this one out. Enjoy!


For additional crayon-melting ideas and techniques, check out Melted Crayon Crafts For Kids.

First Batches


 Note: A few of the resulting crayons separated. I'm not positive why, but I have a few of guesses. First, it could be due to incomplete melting. Or, it could be because of the mixed quality of crayons. Or, it could be because the previously melted layer was too uneven to properly adhere to. My guess is as good as yours... unless yours is better!

Sunday, September 26, 2010

AGA-- Let's Explore Art, At Home

The Art Gallery of Alberta website has a Let's Explore Art section! It looks like it suggests 'at home' activity ideas based upon the current AGA exhibits. (Thank you to my friend who pointed this out to me). It would probably be beneficial to bookmark the site to investigate every now and then and check for new ideas. Oh, and, of course, go and visit the exhibits themselves, get inspired!

If this helps, the AGA has free admission on the last Thursday of every month from 6-9pm.

More Info:
Tours For Tots Wednesdays 11-noon, each week a different theme
All Day Sundays Second Sunday of every month, themed family art activities, 1-4pm


These are some of their ideas:


Create your own Textile Landscape

Use recycled fabric to create your own layered landscape!
What you need: old fabric and material, glue, scissors, stiff paper
What you do:
  1. Collect fabric from old towels, drapes, clothes or visit a second hand store for re-used fabric pieces
  2. Decide what type of landscape you would like to make: seaside, forest, ocean, field, prairie, mountains
  3. Cut different shapes using the fabric and begin to layer and experiment. Try to use lots of overlapping to show things that are up close and far away
  4. When you are ready, glue your fabric to the stiff paper to complete your project!

Create your own Cel Animation

Work like a Warner Brothers artist to create your own background and cel to bring a story to life!
What you need: pencil crayons, paper, transparency paper, sharpie markers, your imagination
What you do:
  1. Create a story. Think of a setting, characters and an action for your story.
  2. Draw and colour a background that shows your story setting.
  3. Draw your characters using sharpie marker on the transparency paper. This is called a ‘cel’ (short for celluloid).
  4. Place the ‘cel’ on the background and then you have the beginning of your animation! Create multiple characters or new poses to animate your story.

Create your own Escher-inspired Drawing

Use a spoon to create a stretched-out drawing just like M.C. Escher!
What you need: large metal spoon, paper, drawing tools
What you do:
  1. Find a large metal spoon and turn it over so the curved side is facing up
  2. Look carefully in the spoon to see how the shape changes your reflection
  3. Draw what you see on your paper. Make sure to look at what parts are stretched and what parts are squished together!

Create your own Imaginary Architectural Sculpture

Use recycled objects to create your own architectural sculpture.
What you need: Recycled objects, glue, scissors, paper.
What you do:
  1. Collect recycled objects in your home such as plastic bottles, disposable dishware, juice containers, and cardboard boxes
  2. Think about what type of building you want to make and sketch your idea. Will your building be symmetrical? Asymmetrical? Look at images by M.C. Escher for inspiration.
  3. Use the recycled objects and start building your design. Your idea may change as you start to build.
  4. Add folded strips of paper to your building to show stairs like M.C. Escher’s!
Related Posts Plugin for WordPress, Blogger...